

We set clear expectations: this guide explains a realistic, step‑by‑step approach to deep cleaning mattress care for Singapore homes. We mean a thorough routine that lifts dust, treats stains and cuts odour, not a quick surface tidy.
Humidity matters. We show how to focus on drying and airflow so a well‑intended clean does not invite mould or mildew. We recommend following manufacturer guidance and avoiding excess moisture.
What you will learn: how to prepare, vacuum properly, treat spots safely, and keep bedding fresh between sessions. We also explain limits of home care so foam, adhesives and fabrics stay safe.
Designed for busy Singapore households, our tips use simple tools, clear timings and low‑mess methods suitable for HDB flats and condos. Later sections cover deodorising with baking soda and when to call a pro for stubborn allergens.
Why deep cleaning matters for a healthier sleep environment in Singapore
We know a mattress collects more than comfort; it gathers sweat, body oils, dust and dead skin over time. This is why regular mattress cleaning forms part of a healthy sleep routine, not a rare chore.
- Dust mites, dander and dirt that settle into layers.
- Body soils that attract bacteria and, in warm air, fungi.
- Pet hair and debris even when a protector is used.
Humidity, mould risk and drying
Singapore’s warm environment helps microorganisms thrive when moisture stays trapped. Over‑wetting during a clean without good airflow can lead to mildew and odour.
“We clean to reduce irritants and keep sleep comfortable, not to cause alarm.”
Who benefits most
Allergy and asthma sufferers, families with children, pet owners, landlords and busy professionals gain the most from targeted upkeep. Professional methods such as steam and extraction reach deep‑burrowing allergens and bacteria that routine vacuuming may miss.
| Group | Main benefit | Tip |
|---|---|---|
| Allergy sufferers | Lower dust triggers | Regular extraction-style care |
| Families & pets | Fresher, safer sleep space | Sanitise and ensure fast drying |
| Landlords & pros | Hygiene assurance | Use professional services between tenancies |
When to deep clean your mattress and how often to keep mattress clean
A clear routine helps us protect sleep quality and reduce allergens over time.
We recommend a simple schedule to keep mattress hygiene on track. Do a light upkeep each month and plan a more thorough session according to household factors.
Recommended frequency for regular mattress cleaning
Baseline: vacuum and spot-treat monthly. For homes with pets, children or heavy sweating, arrange a professional service once or twice a year. In Singapore’s humid climate, twice yearly gives better control of odours and allergens.
Signs your bed needs extra attention
Act now if you notice persistent odour, visible stains, increased sneezing at night, a gritty surface feel, or spots that suggest moisture retention. These signs mean a DIY session may not be enough and a pro might remove entrenched allergens.
- After illness or a spill: clean promptly to prevent odour and stains.
- After haze season or before hosting guests: refresh so the bed feels and smells welcoming.
- If time is tight, prioritise professional care for deeper allergen removal.
| Household type | Light upkeep | Professional service |
|---|---|---|
| Singles/couples | Monthly vacuum & spot-treat | Annually |
| Families & pets | Twice-monthly checks | Every 6 months |
| Allergy sufferers | Monthly plus protectors | Every 6 months (or as advised) |
We answer common questions about timing: clean after spills, after illness, and before guests. A cleaner surface helps us enjoy a better, more restful good night sleep.
What to prepare before we deep clean mattress at home
A small set of tools and sensible precautions set us up to work well and avoid damage. We gather the right items, check label guidance, and plan so we do not add excess moisture to the fabric.
Household supplies and tools we rely on
- Vacuum with an upholstery tool for surface dust and hairs.
- Enzyme cleaner or mild dish soap foam for stains.
- Baking soda to absorb odour and light moisture.
- Cold water and several clean white cloths to blot without dye transfer.
- Fans or air-conditioning to keep airflow for fast drying.
Choosing an enzyme cleaner or mild dish soap solution
For organic marks such as sweat or body fluids we prefer an enzyme product; it breaks down proteins gently and works on odour. For general marks, a foam made from a mild dish soap is a gentler solution that avoids harsh chemicals.
If you want a simple recipe or spray method, see our DIY cleaner spray guide for a practical option.
Protecting delicate materials and checking manufacturer care guidance
When it is our first time using a new product, we patch-test on a hidden edge and wait to check for discolouration or texture change.
Minimise water: use as little liquid as possible. Over-wetting increases drying time and can promote mildew in Singapore’s humidity.
Simple prep steps to prevent rework
Clear the room so air circulates. Set fans or the air‑con to help drying and allow enough time before bedtime.
Follow the mattress care label and avoid stiff brushes on pillow-top fabrics, natural fibres or certain foam cores to protect the warranty and fabric integrity.
Strip the bed and launder bedding the right way
We begin by stripping all bedding so we do not reintroduce soil back onto the surface. Removing sheets, pillowcases and covers gives us full access and stops transfer of dust and skin residue.

Follow care labels. Wash items at the temperature the tag allows. Hot washes can reduce dust‑mite populations and kill some microbes, but avoid high heat for delicates or shrink‑prone fabrics.
How hot washes help and when to avoid them
Hot water is effective against common allergens. Use it for sturdy cottons and protectors that allow heat.
Do not use hot washes for silk, wool or foam-filled items. If in doubt, choose a warm or cool cycle and check the label.
What to do with pillows, covers and protectors
Check pillow tags: some fillings are machine‑washable, others need spot care or professional service. Dry pillows fully to prevent musty odour.
- Wash protectors as the barrier layer and inspect for torn waterproof backing.
- Replace covers if the waterproof layer peels or the zip fails.
“Clean bedding is the quickest way to improve comfort while we work on the mattress.”
Vacuum mattress thoroughly to remove dust, dirt, and dead skin
A thorough vacuum pass is the step that sets every other treatment up for success.
We use a vacuum with an upholstery attachment and set suction low where fabrics or top layers are delicate. Slow, overlapping passes lift surface dust and loose dirt without stressing seams or quilting.
Using an upholstery attachment on low suction
Keep the nozzle clean and work in two directions. This helps remove trapped fibres and reduces the chance of pressing dead skin and dust deeper into the fabric.
Seams, edges, and crevices: where allergens hide
Pay special attention to piping, tufted areas, labels and edge crevices. We deliberately repeat vacuum strokes on these zones to lift settled dirt and hidden debris.
How long to spend for a proper surface clean
For a single bed expect about 8–10 minutes; for a Queen or King allow 15–20 minutes. Pause on the hip and shoulder area, and vacuum high-contact spots twice.
- Why this matters: removing loose material first stops products turning into grime paste.
- Good vacuuming also improves stain treatment and lets deodorising powders work more evenly across the surface.
Spot-treat stains without over-wetting the mattress
When we spot a mark, our aim is to lift it with as little liquid as possible. Controlled moisture prevents water from reaching inner foam or adhesives that take ages to dry in Singapore’s humidity.
Why too much water harms structure and slows drying
Putting excess water into the layers can weaken glues, distort quilting and let fibres stay damp for days. Damp interiors also raise the risk of mildew if airflow is poor.
First‑time checklist before any product use
For the first time with a solution, patch‑test on a hidden edge and confirm colourfastness. Only proceed if no discolouration or texture change appears after drying.
Blotting method for safe stain removal
Apply enzyme cleaner or your product to a white cloth — never pour directly. Press the cloth onto the stain and lift; repeat with a clean area of cloth until transfer stops.
If using dish soap, create foam and dab the foam onto the mark so liquid penetration stays minimal. Follow with a cold water cloth to rinse by blotting, not rubbing.
Do not scrub, use stiff brushes or soak the area. These actions spread stains, roughen fibres and force moisture deeper where it will slow drying and risk damage.
For more guidance on stubborn biological marks, see our note on urine odour and stain removal: how to remove urine smell and.
Target common mattress stains we see most often
Stains tell a story; recognising the likely cause helps us choose the safest treatment.
Sweat and body oil marks
Oils bind to fibres and attract dirt from skin and bedding. We use an enzyme product or mild degreaser and patient blotting to lift oils without soaking the surface.
Tip: Work outward from the edge of the mark and use as small an amount of liquid as possible to control drying time.
Blood spots and why cold water matters
Protein stains set with heat. We keep everything cool, blotting with cold water and enzyme solution so the mark lifts instead of locking in.
Spills and mystery marks from everyday use
For unknown spots, we start mild. If a gentle enzyme or soap foam does not shift the mark, we step up cautiously. Never mix cleaners that might react.
When to stop: If a spot spreads, shows dye transfer, or emits a recurring odour, we pause and consider professional extraction rather than risk further damage.
| Stain type | Best first step | Why we choose this |
|---|---|---|
| Sweat & body oil | Enzyme or mild degreaser, blot | Breaks down oils; minimal moisture protects core |
| Blood | Cold water blot, enzyme if needed | Heat sets proteins; cold prevents permanent stains |
| Unknown spill | Test mild cleaner, increase strength only if safe | Avoids chemical reactions and dye transfer |
Deodorise and freshen with baking soda for odour control
A dry deodoriser like baking soda works quietly while we handle other tasks. It soaks up light moisture and helps neutralise odours rather than masking them.
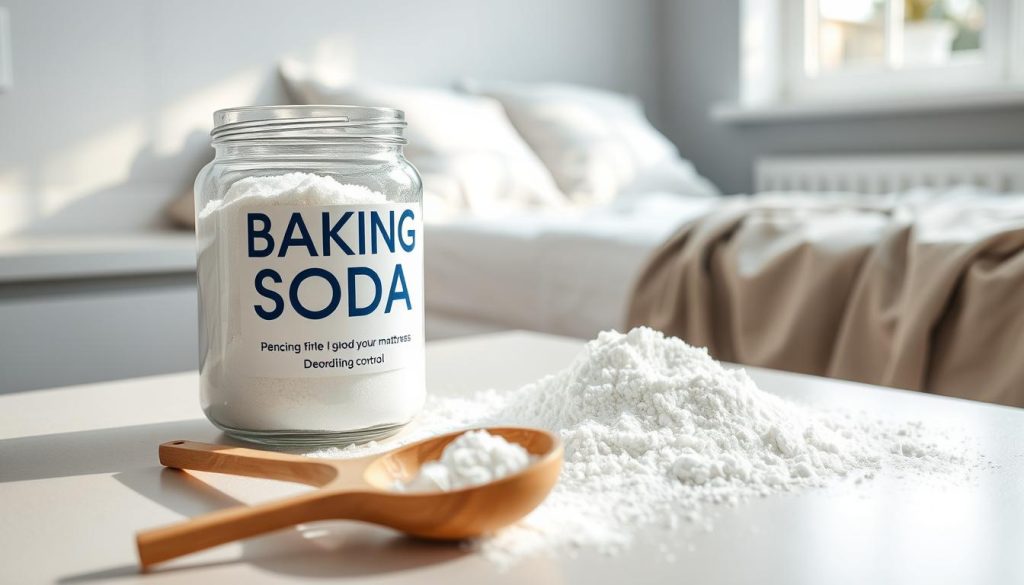
How baking soda absorbs moisture and neutralises smells
Baking soda reacts with acidic compounds in sweat and body oils. This breaks down odour molecules so the smell fades instead of simply being covered.
How long we leave it on before we vacuum again
We sprinkle an even layer across the whole surface, paying extra attention to high-contact zones.
Leave the powder for a minimum of 15 minutes. When time allows, we extend this to a few hours for better odour reduction.
Ventilation tips to speed up freshening in a humid home
While the powder works, we open windows for cross-ventilation when the air is clear. Running fans, air-conditioning or a dehumidifier speeds drying and helps carry away trapped odours.
Keep bedroom doors open to improve airflow in HDB flats. Avoid trying to freshen a damp surface inside a closed room; that can trap moisture and prolong odour.
Final step: remove all residue by passing a handheld or upholstery vacuum slowly and evenly. This ensures no powder remains to attract dust later.
| Action | Why it helps | Typical time |
|---|---|---|
| Sprinkle baking soda evenly | Absorbs moisture and neutralises odours | Immediate |
| Leave undisturbed | Allows reaction with odour compounds | 15 minutes to several hours |
| Ventilate and run fans | Speeds drying and odour removal | During waiting time |
| Vacuum thoroughly | Removes powder and trapped debris | 5–15 minutes |
Drying and airflow: how we prevent mildew after cleaning
Effective drying is the step that stops moisture from becoming a long-term problem. We make drying a full stage in our routine because mildew risk rises when a treated surface is remade too soon in a humid environment.
Practical drying set-ups for Singapore flats
Choose the best area in the flat with steady cross-ventilation. Keep the mattress upright near a window if space and safety allow. Position a fan so air flows across the surface and around the edges.
Run air-conditioning or a dehumidifier to speed drying during haze or wet weather. Set a timer and check after each time block so we do not overheat sensitive layers.
What to do if the mattress still feels damp
“Dry enough” means the surface feels dry, seams are not cool to the touch and there is no musty smell as the room warms. If dampness remains, extend the time and rotate orientation to expose different areas to airflow.
- Increase airflow and circulation; open doors for better movement of air within the home.
- Delay remaking the bed until we are confident the interior is dry to the touch.
- For memory foam or latex, avoid direct heat. Prioritise steady airflow rather than intense heat which can deform layers.
Good care of this stage protects the structure and keeps the sleeping environment healthy. Spend the extra time now and we avoid costly problems later.
Protect and maintain a mattress clean finish between deep cleans
A few simple habits keep a freshly treated bed feeling and smelling good for months. After we let the surface dry completely, fitting a protector is the first defence.
Choose a protector that is breathable yet spill-resistant. In Singapore we favour fabrics that wick sweat but allow airflow so heat does not build up. A fitted, zippered protector with a thin waterproof backing works well for daily life.
Monthly habits and quick responses
Simple, repeatable steps prevent grime from embedding in seams and quilting. We vacuum monthly and spot-treat spills immediately with a small stain kit.
- Vacuum lightly during sheet changes; focus on high-contact areas.
- Blot spills at once; avoid over-wetting and patch-test any product.
- For homes with kids or pets, inspect the surface every time we change sheets.
“Prevention saves time and money — small actions now mean fewer intensive sessions later.”
| Action | Frequency | Benefit |
|---|---|---|
| Fitted protector | After each full dry | Prevents stains and reduces odour buildup |
| Light vacuum | Monthly | Removes dust and loose debris |
| Quick spot treatment | As needed | Stops marks setting and limits future work |
Result: these steps keep a clean mattress finish longer, lower the need for specialist work, and extend the life of the bed while saving us money.
DIY vs professional deep cleaning: what we can realistically achieve at home
Our choice to DIY or call a pro should match the problem, the time we have and allergy risk in the home.
Home upkeep versus entrenched dirt and allergens
For routine care we can vacuum, spot-treat stains and use baking soda to freshen. These actions remove loose dust and surface dirt and help our sheets stay clean.
What home methods cannot do: they cannot pull deeply embedded dust or allergens from the core. Household vacuums and spot treatments often loosen particles without removing them fully.
Why professional equipment reaches deep-burrowing dust mites and microbes
Specialist services use powerful extraction, controlled hot vapour and stronger suction. These systems remove contaminants rather than just displacing them.
That matters because dust, pore debris and biological matter can sit well below the cover. Pro tools reduce allergen load and lower odour more reliably than home kits.
Time and effort trade-offs for busy households
DIY costs less but takes more time and repeated effort. A thorough home routine helps maintain results between services, but it rarely equals a professional deep clean in one visit.
Our recommendation: carry out regular mattress cleaning at home for upkeep, and consider professional service annually or when odour, persistent stains or sleep disruption due to allergies affect our rest.
Professional mattress deep cleaning options available in Singapore
When we compare professional services, we weigh three things: drying time, effectiveness against allergens, and whether moisture is acceptable in our home.
Steam at 170°C: fast heat sanitisation
Steam treatment uses very hot vapour (around 170°C) to target germs, bacteria and some viruses. It refreshes the core and usually needs about 30–60 minutes to dry, depending on ventilation.
Extraction for stains and allergy control
Extraction pulls out deep-seated dust mites, allergens and soils. It is the best choice for stubborn marks and heavy allergen loads.
Drying is typically lightly damp and finishes in about 1–3 hours with good airflow.
UV-C: dry, chemical-free disinfection
UV-C offers a 100% dry, chemical-free option. Providers cite up to 99% reduction in microbes, and there is no drying downtime.
Types, sizes and typical costs
Services commonly cover memory foam, latex, hybrid, pillow-top and pocket-spring models, plus baby cots. Sizes run from Single to Super King.
Rates vary depending on the cleaning method and mattress size.
Price factors: size, type of mattress, severity of odour or stains, and add‑ons. Rates vary by provider and method, with extras possible.
“Match the method to the problem: fast drying for humid homes, extraction for severe allergen loads.”
Conclusion
To finish well, we follow a short, ordered routine that protects fabrics and cuts odour risk. Start with prep, strip bedding, vacuum thoroughly, spot‑treat by blotting, deodorise with baking soda, vacuum again and allow plenty of drying time before remaking the bed.
Two simple facts guide us: control moisture — never soak the surface — and allow sufficient drying time. These prevent mildew and lingering smells in humid Singapore homes.
Keep results longer with a breathable protector, quick spill response and monthly upkeep. Call professionals when allergies recur, stains persist or smells remain despite home care.
Follow manufacturer guidance for warranty and material safety. A fresher bed feels better and helps us sleep well at night.

