
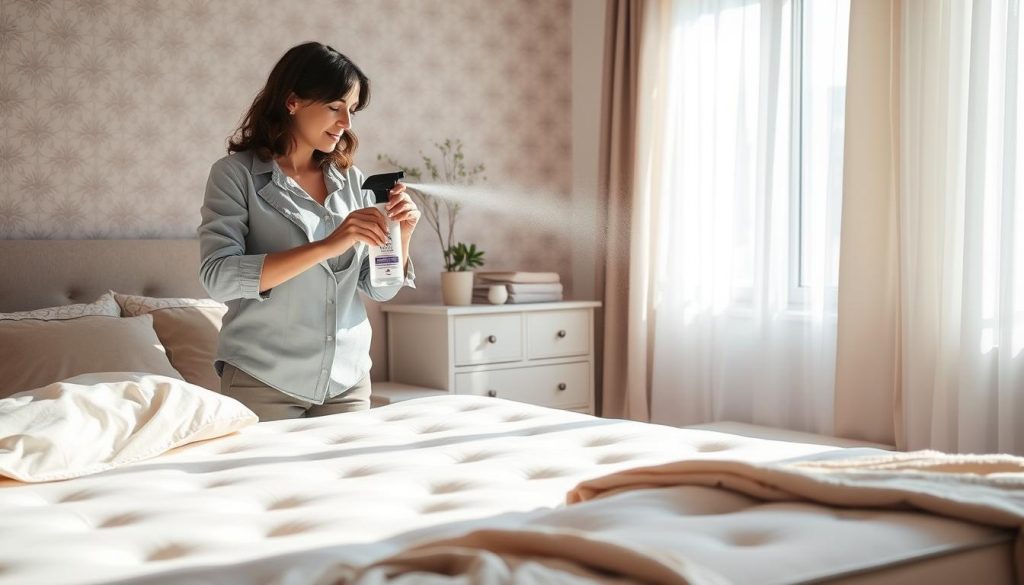
We set clear expectations: this guide shows practical, at‑home methods to reduce odours and restore freshness. Some problems need only surface deodorising, while deep stains or trapped moisture require professional care.
Odours often start from sweat, spills, pets, dust and lingering moisture. They can sit inside layers, not just on the top, so our approach targets residue and dampness before any fragrance is added.
We favour household-friendly techniques that work in Singapore’s humid HDB and condo settings: baking soda with vacuuming, white vinegar for targeted spots, careful drying and spot treatments for stains.
Tools we keep on hand include a vacuum with upholstery and crevice attachments, clean towels and a spray bottle. Technique matters as much as products: avoid over-wetting, rubbing stains deeper or remaking bedding too soon.
Throughout this short guide we signpost methods by common smell types — sweat, urine, pets or general stale odour — so you can jump to the way that fits your home. Freshness supports better sleep and hygiene, and that is our practical aim.
Why our mattresses develop smells over time
Over months of nightly use, tiny particles and dampness quietly build up inside the layers, causing an unpleasant odour. We break down how common sources accumulate so you can spot the right fix.
Sweat, moisture and Singapore’s humidity
Our bodies release sweat every night. In Singapore’s humid air, evaporation is slower. That means sweat and trapped moisture stay longer and feed a stale, musty smell.
Spills, stains and old accidents that set in
Unattended spills and stains sink deeper over time. Liquids reach inner layers, and the longer they sit the harder they are to treat. Foam cores are especially absorbent, which can intensify odour retention.
Dust, dead skin cells and dust mites
Skin flakes, dust and mites collect in seams and the surface. These particles feed microbes and add to both smells and allergy issues. Regular vacuuming and a protector reduce build up.
Pets on the bed and lingering odours
Pets add fur, dander and sometimes urine. These increase odour risk and can lead to repeat soiling if the source is not fully neutralised. We recommend prompt spot care and enzyme cleaners when needed.
- Tip: If you want a deeper explanation of how smells form over time, read our detailed guide on odour causes.
- Prevention: Use a protector, ventilate the room, vacuum regularly and treat stains quickly to avoid long-term problems.
What to do immediately when you notice a smell
When we detect a new smell, our priority is to prevent transfer and limit penetration. Act quickly: stains become harder to treat with time, so the first ten minutes matter.
Strip and launder bedding
Remove all bedding at once. We take sheets, pillowcases, protectors and duvet covers to the wash immediately. This reduces the chance that odours set back into the bed.
Blot—do not rub
Press with clean towels to lift moisture. We work from the outside of the affected area inwards. Swap to dry cloths as soon as one gets damp. Rubbing drives liquids deeper and makes stains worse.
- Lightly spray a cloth with a cleaning solution if needed; never spray the surface directly.
- Let air circulate before remaking the bed so trapped dampness does not cause mustiness.
- Test any cleaner on a hidden patch and avoid harsh chemicals or bleach.
Next steps: depending on the odour, we deodorise with baking soda, neutralise with white vinegar, or use targeted stain methods. For extra guidance on deep stains, see our note on how to clean.
Mattress scent removal with baking soda and vacuuming
Using baking soda and a careful vacuuming routine is one of the simplest at‑home ways to refresh a bed. We start by stripping bedding and confirming the surface is dry to the touch so the powder won’t clump.

How we apply the powder: we sprinkle baking soda evenly, concentrating on the area with the strongest odour. For even coverage we sift or shake the box in a light, sweeping motion.
How long we let it sit
For light smells we usually let it sit for about an hour. For stubborn odours we let it sit longer so the baking action has time to work.
Vacuuming technique
We vacuum using an upholstery attachment across the surface, then switch to a crevice tool for seams, piping and tufts.
- Vacuum the sides and the zip edge where dust collects.
- Expect to pass over textured covers more than once to remove all powder.
Adding fragrance safely
To add a fresh note, we mix a few drops of essential oils into the baking soda and stir before applying. This avoids oil spots and gives a light, even fragrance.
“Baking soda is our baseline deodoriser; move to vinegar or targeted stain care only if smells persist.”
| Step | Action | Typical time |
|---|---|---|
| Prep | Remove bedding; ensure dry | 5 minutes |
| Apply | Sift baking soda evenly; add essential oil if desired | 2–4 minutes |
| Dwell | Let sit for odour absorption | 1 hour (longer if needed) |
| Clean | Vacuum surface, seams and sides; repeat passes | 5–10 minutes |
Neutralising odours with a white vinegar cleaning solution
We rely on white vinegar because it neutralises organic odours and helps break down residue from spills and body oils. The approach is gentle and uses items many homes already have.
Our practical spray mixture: mix equal parts distilled white vinegar and water, then add 1–2 tablespoons of a gentle laundry detergent for urine-related stains. Use a spray bottle and always test on a hidden patch first.
Our spray method and contact time
We do not flood the area. Instead, we spray the solution onto a clean cloth and dab the spot. For sturdier covers, a light direct spray may be OK.
Let the mixture sit for about 15 minutes before blotting with absorbent towels. This brief contact time gives the vinegar a chance to neutralise odours and loosen residue without over-wetting the interior.
How to air dry properly
Air dry fully: good ventilation speeds evaporation and prevents mustiness returning. Open windows, use a fan, and allow plenty of time; drying can take hours to days depending on humidity.
A damp core is the main cause of recurring musty smells in Singapore’s climate. Confirm the area is dry before you remake the bed and repeat the neutralising step only if the surface is moisture-free.
| Action | Why | Typical time |
|---|---|---|
| Mix solution | Neutralises odours; loosens residue | 2 minutes |
| Apply via cloth | Controls moisture; protects cover | 2–5 minutes |
| Let sit | Allow vinegar to act | ~15 minutes |
| Blot and air dry | Remove moisture; prevent mustiness | Hours–days (depends on humidity) |
Targeted treatments for common odour sources
We choose methods that neutralise the source and draw moisture out rather than mask it. Below are step-by-step ways to handle urine and oily body residue so you can restore a clean mattress and better sleep.
Urine smells and stains: a practical workflow
Strip the bed and blot immediately. Press with absorbent towels; do not rub. Then mix equal parts water and vinegar and add 1–2 tablespoons of gentle laundry detergent.
Lightly apply the solution to a cloth and dab the area. Let the mixture sit for about 15 minutes, then blot again to extract moisture.
Cover the spot with a generous layer of baking soda and leave it to absorb for many hours—overnight is best. Vacuum thoroughly and repeat if odour or stains persist.
Set-in odours and repeated treatments
Set-in means dried stains that have penetrated deeper layers after repeated accidents or long exposure. These may need several rounds of the same cleaner and powder. Foam cores absorb quickly, so we limit liquids and rely on blotting plus powders to lift residue.
Body oil smells
For oily residues we use a dry blend of baking soda and cornstarch to draw oils out. Sprinkle, let sit for several hours, then vacuum. Check progress only after the area is fully dry to avoid masking remaining odour.
“Treat the source, give it time, and dry completely before judging results.”
When to use hydrogen peroxide or enzyme cleaners
If basic cleaning does not shift entrenched odours or dried stains, we escalate to oxidising mixtures or enzyme-based products. These are practical ways to tackle residue that has bonded to fibres or sunk into layers.
Hydrogen peroxide mixture for stubborn, dried stains and odours. Mix 1 cup hydrogen peroxide, 3 tablespoons baking soda and a few drops of dish soap or liquid laundry detergent. We apply this blend sparingly to dampen the stained area, never soak it.
Expect a powdery residue as it dries. We let the area air dry fully, then vacuum the residue only once it is completely dry to avoid grinding particles into the fabric.
Material and discolouration cautions
Test first. Hydrogen peroxide can discolour covers and may harm foam or latex cores. We patch-test on a hidden seam and use the smallest effective amount.
Protect nearby sheets, carpets and baseboards from overspray and avoid harsh products such as bleach.
Enzyme cleaners for pet urine
Enzymes break down the compounds that cause lingering urine odour. For homes with pets, an enzyme cleaner is our preferred choice because it removes the source rather than masking the smell.
Use a product designed for the specific animal, follow label directions for dwell time and saturation, and allow full drying. If pets still detect residue, they may return to mark, so enzyme treatment reduces repeat incidents better than vinegar in some cases.
“Treat the source, test materials first, and dry completely before deciding if further action is needed.”
| When to use | What to apply | Key caution |
|---|---|---|
| Stubborn, dried organic stains | Hydrogen peroxide mixture (1 cup H2O2 + 3 tbsp baking soda + drops of detergent) | Patch-test; avoid over-wetting; may discolour fabric |
| Pet urine and repeat marking | Enzyme cleaner formulated for the pet | Follow label; allow full dwell and drying time |
| Deep-set odours after baking soda/vinegar | Escalate to targeted cleaner and repeat blot-dry cycles | Protect surrounding textiles; avoid bleach |
For detailed guidance on treating urine-related stains and odours, see our practical note on how to get urine smell and stains.
Drying and ventilation steps that prevent odours coming back
Airflow and patient drying often decide whether a cleaning effort truly succeeds or merely postpones the problem. We treat drying as a core part of any cleaning plan, not an optional final touch.
Room airflow to speed evaporation
Whenever weather allows, we open windows and doors to create cross-breezes. We add a fan to move air across the surface and lift moisture away from the area.
Where space permits, we slightly separate the base so sides can breathe. Good ventilation reduces time to dry and lowers the chance of mildew forming overnight.
How we confirm the core is fully dry
We press a clean, dry towel to the treated spot to check for damp transfer. If the towel comes away cool or damp, we wait longer.
We also sniff close to the cover and feel for any coolness. If there is none, and the surface feels room temperature, we air dry further for extra assurance.
Tip: delay remaking the bed until the area is unequivocally dry. Avoid aggressive heat like hairdryers on a high setting; steady air is safer and helps keep the surface intact.
“Ventilation is part of regular care — consistent airflow helps keep the bed fresh between deeper cleans.”
How we keep a mattress smelling fresh long-term
Long-term freshness starts with simple, repeatable habits rather than frequent deep cleans. We favour barrier protection, light maintenance and steady ventilation to reduce the need for heavy treatments.
Using a waterproof protector to block spills and sweat
We fit a mattress protector to shield the surface from spills and sweat. A good protector stops liquids reaching layers and makes clean-ups quick.
Tip: wash the protector regularly so it continues to block odour and dust mite exposure.
Regular vacuuming to reduce dust and dust mites
We vacuum the top, seams and sides every 7–10 days using an upholstery tool. This removes dust, hair and dust mites before they build up.
Don’t forget the base; vacuum the box spring or foundation periodically to prevent smells returning from underneath.
Cleaning cadence and day-to-day tips
We wash bedding weekly and schedule a deeper clean at least every six months. This cadence keeps the bed fresh and cuts the need for harsh liquids on foam layers.
- Avoid eating or drinking in bed where possible.
- Manage pet access if odours recur.
- Address small spills immediately by blotting and airing.
“Consistent, light care reduces the chance of heavy treatments and helps extend the life of foam and latex cores.”
Freshness checklist: protector on, sheets changed, vacuum done, base cleaned and room aired. Follow these tips and we can keep mattress upkeep simple and effective.
When to consider professional mattress cleaning in Singapore
Professional cleaning becomes sensible when home methods no longer restore confidence in hygiene. We book a service if persistent odors remain after repeat treatment, if large or old stains are present, if we suspect a high dust mites load, or if bed‑bug concerns arise.

What a professional service can help with beyond odours
Professionals offer deep extraction, specialised stain work and treatments such as UV‑C, steam or hot‑water extraction. These approaches can reduce allergen load and treat infestations that DIY steps cannot reach.
Typical Singapore rates and cost factors
Expect most cleaners to price the job based on size, severity and whether both sides need attention, with rates varying across providers. Some providers charge less for single-side work.
| Service | Notes |
|---|---|
| Basic deodorise & vacuum | Light odors; quick turnaround |
| Deep extraction / stain treatment | For set-in stains and heavy soils |
| Specialised treatments (UV-C / pest) | Bed-bug or sanitisation work |
Ask before you book: which method suits foam or latex, how drying is managed, and whether non‑toxic products are used for pets or children. A pro clean should reset the condition; then we use protectors, ventilation and routine vacuuming to maintain results.
“Use professional services as a complement to good home care—compare quotes, check what’s included, and avoid low‑cost options that skip proper extraction.”
Conclusion
Tackling smells early saves time, protects materials and keeps sleep comfortable. Our practical ways start with identifying the source, stripping the bed and blotting—never rubbing—so stains do not set. For deodorising we favour vacuum baking soda, and for many odours a vinegar neutraliser works well.
Drying is the single biggest success factor in humid Singapore. We only let mattress surfaces cool and dry fully before remaking the bed.
Escalate carefully: use hydrogen peroxide sparingly for stubborn, dried stains and choose enzyme cleaners for pet urine to cut repeat marking.
Prevention is easiest: fit a quality waterproof protector, vacuum the seams and sides regularly, wash bedding weekly and clean the base so odours do not cycle back. A fresher sleep starts with steady, simple care.

