

Welcome. We offer a clear guide for anyone preparing a second-hand sleep surface for their home. Our aim is practical: remove dust, tackle stains and reduce odour while avoiding excess moisture that invites mould.
We explain what a realistic result looks like for a used mattress, and when replacement or professional help is wiser. Expect stepwise tasks: prepare the room, vacuum, air out, spot-treat, deodorise and dry fully before making the bed.
Safety first. Patch test cleaners, read fabric labels and keep ventilation strong in humid flats. We favour common household items but note when enzyme products or 3% peroxide are useful for stubborn stains.
Follow our compact plan and you will lower allergen risk and improve sleep quality. We keep instructions simple and practical so households in Singapore can act with confidence.
Why we recommend deep cleaning a used mattress before it enters your home
Before any second‑hand sleep surface reaches your bedroom, we treat it as a high-contact item that needs a full refresh.
What builds up over time. Nightly contact for seven to eight hours lets sweat, oils and dead skin work into fibres. Dust and dust mites collect in seams and tufted zones. These loads reduce comfort and raise allergen exposure.
Health and hygiene risks
We reduce bacteria and fungi that can live in old stains. Trapped moisture can encourage mould and mildew, which worsen sneezing or throat irritation. Lingering body fluids are not solved by deodorising alone; disinfection and drying are essential.
Comfort and longevity
Keeping a mattress dry and free of grit helps it keep support and feel fresher for longer. Dirt and fluids sink into layered materials over time and speed wear.
- Inspect, vacuum and treat stains before bringing the item indoors.
- Deodorise, sanitise and make sure it is fully dry.
- Follow our detailed stain advice in the stain removal guide.
| Issue | Risk | Our action |
|---|---|---|
| Sweat, oils, dead skin | Odour, bacteria growth | Vacuum, spot treat, dry fully |
| Dust and dust mites | Allergic reactions, sneezing | HEPA vacuum, air out |
| Mould and mildew | Respiratory irritation | Remove moisture, apply mild sanitiser |
What to check before cleaning: mattress type, care labels and visible red flags
We begin by identifying construction and condition. This step guides our choice of products and how much moisture we allow near inner layers. Memory foam and other foam types need gentler handling than traditional coil builds.
Material considerations: memory foam versus traditional builds
Memory foam holds water and dries slowly. We avoid heavy soaking on any foam surface and prefer minimal liquid methods. For traditional spring or fibre mattresses we have more leeway but still follow the maker’s care label.
Quick inspection points: seams, crevices, stains and musty odours
Under bright light we scan the surface, edges and underside for stains, tears and worn spots. Pay attention to seams and crevices; they collect dirt and pests.
Note any musty odour before beginning. This helps us judge whether deodorising and drying have worked. Finally, we patch test with a damp cloth and a mild cleaner in an inconspicuous area to make sure the fabric will not bleach or ring.
Cleaning kit we use at home for safe, effective results
An orderly kit saves time and prevents accidental over‑wetting during stain work. We gather tools, staples and targeted sanitisers before moving the item into our well‑ventilated area.
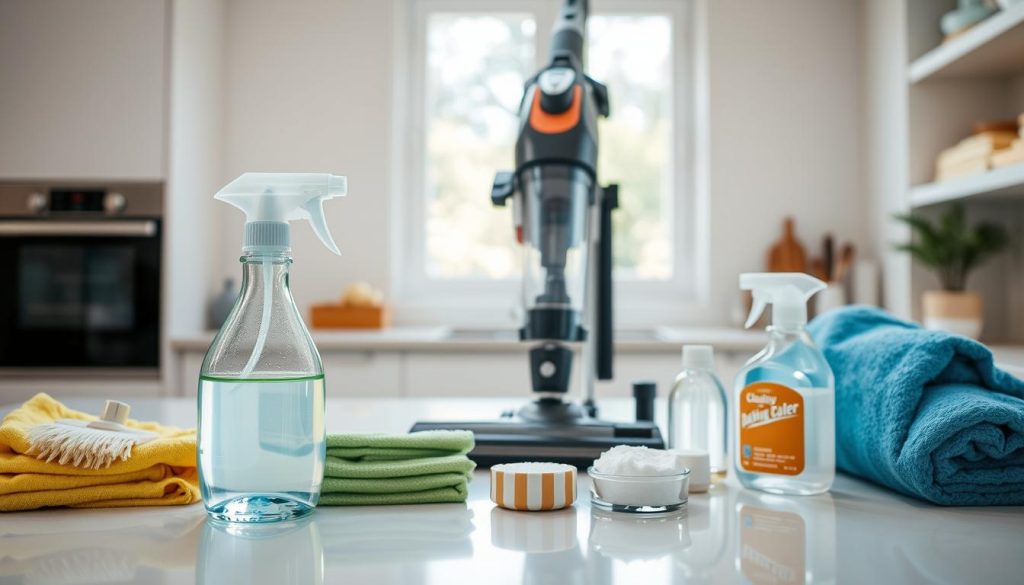
Essentials: a heavy‑duty vacuum with upholstery and crevice attachments, a spray bottle for misting, several clean cloths and a soft brush for gentle agitation.
Staples: baking soda for odour control, mild laundry detergent for general grime, white vinegar for mould spots and clean water for careful blotting. We keep baking soda on hand for deodorising between steps.
Targeted sanitisers: 3% hydrogen peroxide for sanitising small stains and an enzyme cleaner for organic odours that keep returning. We reserve these for problem areas only.
Set‑up helpers: a plastic liner to protect floors or balcony tiles, fans for cross‑ventilation and a sunny, airy drying spot. We work in short, controlled steps — mist, blot, and repeat — and use gloves and spare cloths for repeat blotting.
“Keep moisture minimal; misting and blotting protect inner layers and shorten drying hours.”
| Item | Purpose | When we use it |
|---|---|---|
| Vacuum (with attachments) | Remove dust and debris | First step, before any wet treatments |
| Baking soda | Neutralise odours | After spot work, left for hours then vacuumed |
| 3% hydrogen peroxide / enzyme cleaner | Sanitise or break down organic stains | For persistent spots, used sparingly |
Practical tip: have a cover ready for after drying to cut re‑soiling and extend freshness.
How to clean a used mattress step by step
Prepare the area first. We work outdoors or on a balcony when possible and lay down plastic. This keeps dust and any pests from spreading around the home.
Strip and launder
We remove all sheets, bedding and pillows. Wash these items on a hot cycle if the fabric allows, then dry fully before reuse.
Vacuum thoroughly
We vacuum the sleeping surface, then the sides, seams and tufted zones. For allergy sufferers, we use a HEPA vacuum to reduce airborne dust and mites.
Air and spot‑treat
We leave the item uncovered in strong airflow to reduce dampness and odours. For stains, we mist a mild solution and blot with a damp cloth. Avoid saturating inner layers.
Deodorise and final check
We sprinkle baking soda across the top and leave it for several hours or overnight, then vacuum again. Finally, we confirm the item smells neutral, looks fresher and is dry before covering or encasing.
“Short, controlled steps protect materials and shorten drying hours.”
How we treat common mattress stains without over-wetting
Our guiding principle is simple: tackle spots with minimal water and focused action. We treat each mark locally, blot more than we scrub, and keep moisture near the surface only.
General discolouration
For general discolouration we use an upholstery cleaner or a mild detergent solution. Apply sparingly, then blot with a clean cloth until transfer stops. Repeat in short bursts rather than soaking the area.
Sweat and body fluids
We make a baking soda paste or spray, leave it for about ten minutes, then gently scrub and blot. This lifts residue while avoiding excess water that can trap odour.
Blood
Keep water cold to avoid setting the mark. Use a targeted stain remover, then blot with a well‑wrung damp cloth. Limit cycles of wetting and drying to protect filling.
Urine
First wash the spot with a mild detergent. Then apply a careful mix of 1 cup 3% peroxide, 2 tbsp baking soda and a few drops of dishwashing liquid. Spread lightly, wait a few minutes, then wipe with a barely damp cloth.
For extra reference, see our recommended steps on removing urine odour and stains.
Oil and grease
Use an aerosol solvent made for upholstery. Spritz briefly and follow product directions to avoid soaking the padding.
Mould and mildew
Treat affected spots with white vinegar, allow to dry fully to reduce spores, then deodorise with baking soda once the area is dry.
“Treat spots locally and keep moisture minimal — that protects layers and speeds drying.”
Deep clean and sanitise for a truly hygienic mattress
We define deep clean as the phase that targets microbes, allergens and embedded residues beyond visible marks. This step gives real protection against dust mites and reduces bacteria that routine care may miss.

Steam passes that work
We use steam in slow, overlapping passes. Move the nozzle steadily across sleep zones, edges and seams. Hold close enough for heat but avoid drips that over‑wet inner layers.
Why steam helps: steam can kill dust mites and lower bacteria counts while refreshing fibres.
Enzyme cleaners for stubborn residues
When odours or stains return after drying, we apply an enzyme product. Enzymes break down organic matter that ordinary detergents leave behind.
Careful peroxide use
We use 3% peroxide sparingly. Patch test first, apply lightly and blot. Allow full drying before covering; even a few damp minutes trapped under linen can cause problems in humid Singapore.
Practical note: after any deep sanitising, give ample drying time and check key areas again before reuse.
Bed bugs and dust mites: how we reduce the risk on a second-hand mattress
Pests can lurk in seams and folds even when the surface looks fresh, so we inspect carefully. A focused check helps us spot rust-coloured spots, live bugs or shed shells around seams, piping and creases.
Signs to look for during inspection: spots, shells and activity around seams
Look closely at edges, tufts and the underside. Small dark stains, tiny pale exoskeletons and faint odour often mark infestation.
Heat treatment via steam: focusing on edges, folds and crevices
We use controlled steam passes, moving slowly over edges, folds and tight crevices. Steam reaches eggs and adults without soaking inner layers.
Use a bed bug-proof encasement to trap what you cannot see
After treatment, we fit a fully zipped cover. A certified cover traps survivors and makes later checks simple.
Follow-up checks after cleaning to confirm the mattress stays clear
We inspect again over the following weeks and keep the surrounding bed area free of dust and dirt. Regular checks and a clean cover reduce risk and give lasting peace of mind.
| Step | What we look for | Why it matters |
|---|---|---|
| Visual inspection | Rust spots, shells, live activity in seams | Identifies active infestation early |
| Steam treatment | Edges, folds, crevices | Kills eggs and adults without over-wetting |
| Encasement | Fully zipped cover | Traps remaining pests; eases monitoring |
Drying and ongoing care in Singapore’s humid climate
Drying is the single most critical step in Singapore’s humid environment. We rely on direct sun when possible, open windows for cross‑ventilation and run fans to cut drying time.
Quick drying basics
After any spot work, leave the item uncovered until it feels cool and fully dry. We check by touch and by smell — no musty odour means it is safe to add sheets.
Monthly rhythm and immediate responses
We set a monthly deep‑clean: vacuum, sprinkle baking soda and vacuum again. If liquid stains appear, we act fast with minimal water and heavy airflow to stop settling.
Preventive habits for longer freshness
Use a good cover, change sheets weekly and keep the surrounding area tidy. Clean under the bed and nearby carpets to reduce dust returning to the surface.
Rotation and flipping guidance
Rotate head‑to‑foot every 5–6 months unless the manufacturer recommends otherwise. We do not flip one‑sided designs; that preserves support and avoids damage.
“Dry thoroughly before replacing bedding — that single step prevents musty odour and protects inner layers.”
| Action | What we check | Frequency |
|---|---|---|
| Sun + fans | Surface feels dry and cool; no smell | After any spot treatment, until dry |
| Monthly deep clean | Vacuum + baking soda deodorise | Monthly (more if allergies) |
| Preventive care | Cover, weekly sheets, clean area under bed | Weekly for sheets; area monthly |
Conclusion
This final note ties the key actions into a simple routine that protects hygiene and comfort.
Inspect first, vacuum thoroughly and air the surface well. Spot treat stains with minimal moisture, deodorise using baking soda, then sanitise with measured steam or careful peroxide where needed.
Make sure the item dries completely after any wet work. Avoid soaking inner layers; that prevents mould in humid Singapore and keeps dust and dirt from settling back in.
Keep to regular care: weekly bedding washes, monthly deep cleaning, a good cover and prompt stain response. If strong smells or deep-set marks remain, consider replacement rather than forcing poor sleep outcomes.

