

We introduce what a sofa leather cleaner is for and why correct care matters in Singapore homes. Leather is often easier to maintain than fabric and does not harbour dust mites as readily. Prompt spill handling—blotting with a soft, dry cloth—helps prevent discolouration.
We set clear expectations: this guide aims to improve day-to-day appearance, lift surface dirt and oils, and manage stains without over-wetting or stripping protective finishes. Our approach balances quick upkeep with deeper routine work.
At a high level we prepare, identify the leather type, perform a quick routine, then a deeper clean, spot-treat issues, address mould risk, and finish with conditioning and protection. Quick upkeep suits weekly or as-needed wiping; deeper work typically falls on a 3–6 month cadence.
Why this matters: correct care extends usable life over years, prevents cracking, fading and sticky patches in high-use areas. We also preview what not to do to avoid common damage: harsh chemicals, too much water, and abrasive cloths.
What we prepare before we clean leather sofa surfaces
Before we begin, we lay out a short checklist to keep the task fast and safe. This helps us avoid common mistakes and protects the finish on older pieces.
Tools and products we recommend for home cleaning
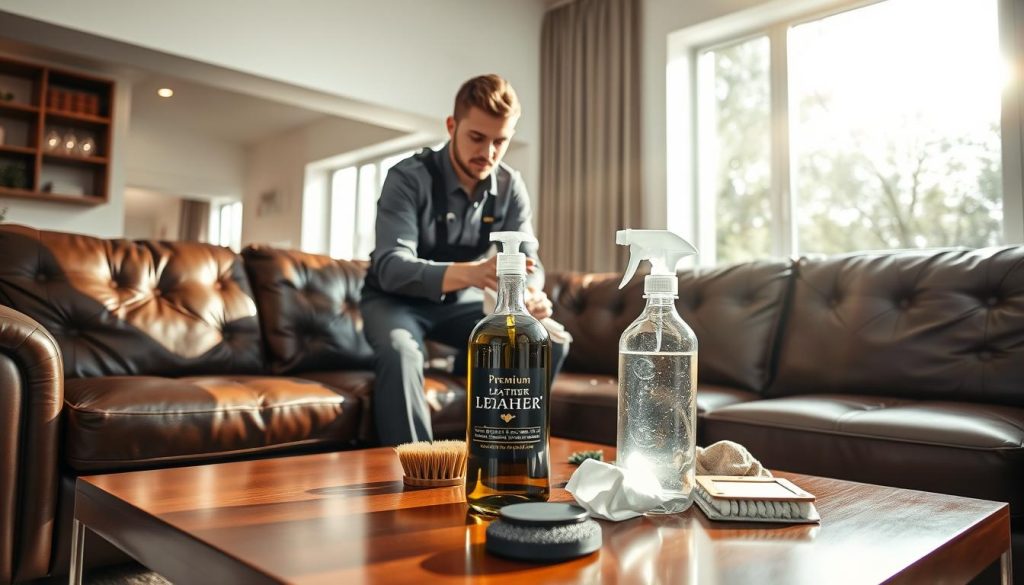
We pack microfibre cloths, a vacuum with a brush attachment, a mild pH-balanced cleaner and a soft-bristled brush for textured grain.
Why multiple cloths matter: one for applying the solution, one for wiping residue, and one dry for final drying. This reduces streaks and stickiness.
How we set up the area to avoid damage
We remove cushions and accessories, protect nearby flooring from drips and move side tables away. Good airflow is important in Singapore’s humidity so the surface dries quickly.
- Stage cushions separately and check seams for trapped dust or dirt.
- Work panel-by-panel to avoid over-wetting high-use zones like armrests and headrests.
- Perform a label check and a small patch test to match our method to the furniture’s finish and age.
| Item | Purpose | Notes |
|---|---|---|
| Microfibre cloths | Apply and remove solutions | Use three distinct cloths to avoid cross-contamination |
| Vacuum (brush) | Lift dust from seams and tufting | Gentle suction only; avoid hard nozzle contact |
| pH-balanced cleaner | Surface cleaning | Choose leather-specific products; avoid unknown household cleaners |
| Soft-bristled brush | Textured grain cleaning | Use lightly to dislodge trapped dirt |
How we identify your leather sofa type before cleaning
Our first step is to inspect the cover carefully; knowing the material guides every cleaning choice.
We use quick visual and tactile checks to judge absorbency, sheen and grain. This tells us how much moisture and pressure we can safely use.
Aniline and pull-up: why we use a lighter touch
Aniline and pull-up hides are the most natural and delicate. They absorb stains fast and can darken when wet.
We apply minimal moisture, press gently with a soft cloth and dry quickly to avoid blotches or colour shift.
Semi-aniline, top-grain and pigmented finishes: more forgiving
Semi-aniline has a light protective coat. Top-grain is a finished upper layer of the hide, with a more uniform look.
Pigmented or protected finishes carry a polymer layer and resist spills better. We still remove residue carefully to avoid dull build-up.
Bonded and synthetic: care limits and peeling risks
Bonded pieces and PU/PVC look consistent but contain little real hide and can peel or crack over time.
We avoid aggressive rubbing, harsh products and heavy conditioners that can worsen stickiness.
Note for Singapore owners: mixed or “half leather” furniture may need different methods on contact and non-contact panels.
| Type | Key traits | Care note |
|---|---|---|
| Aniline | Natural hide; visible grain; high absorbency | Minimal moisture; gentle pressure; fast drying |
| Pull-up | Oiled aniline; colour shifts when moved | Light touch; rub to blend minor scratches |
| Semi-aniline / Top-grain | Light protection; uniform layer; moderate stain resistance | Routine wipes; remove residue to avoid dulling |
| Pigmented / Protected | Polymer-coated; most forgiving | Can handle mild solutions; avoid abrasive tools |
| Bonded / Synthetic | Low real hide content; uniform finish | Avoid over-conditioning; gentle cleaning to prevent peeling |
Our quick routine for a sofa clean when time is tight
A quick, careful tidy can restore the surface for guests without risking damage. We focus on three short actions that protect the grain and cut prep time.
“Dust first — it prevents grit from scratching the finish when you wipe.”
Dry cloth dusting to protect the grain from scratches
We start with a dry cloth to lift loose dust and crumbs. This simple step reduces the need for rubbing and keeps the finish smooth.
Vacuuming seams, crevices and cushions with a brush attachment
Next we vacuum with low suction and a brush attachment. Move slowly along seams, crevices and tufting where dirt and crumbs collect.
Lift cushions carefully and vacuum both sides when possible. Check gaps and piping; trapped debris can grind into the hide over time.

Fast wipe-down and thorough drying with a soft cloth
Lightly dampen a cloth and wipe small sections; avoid over-wetting to control moisture in humid Singapore weather. Blot dry with a soft cloth rather than rubbing.
If a visible stain appears, we stop and spot-clean instead of spreading the mark. If time allows, apply a light conditioner after drying to restore oils.
How we use sofa leather cleaner for a deeper clean
We concentrate on restoring the finish in busy zones before treating the whole surface. Our objective is to lift built-up oils and grime from armrests, headrests and seat fronts while preserving the protective layer.
Applying product with controlled motion
We never apply the cleaner directly onto the hide. Instead, we place a small amount on a microfibre cloth and work in gentle circular motions. This evens the action and avoids saturating the surface.
Removing residue to prevent tacky build-up
After a light pass we wipe the area with a second clean cloth. Leftover residue can dry into a sticky layer that attracts dust and makes future cleaning harder.
When we repeat passes and when we stop
We repeat only while the cloth shows visible soil and the finish remains stable. If colour transfer appears or the surface looks stressed, we stop and allow a full dry cycle.
- Moisture control: avoid pooling water or solution along seams and piping.
- Wear prevention: use multiple light passes rather than one aggressive scrub to protect the protective layer.
- After-check: even sheen, no streaks and no sticky feel before conditioning.
| Step | Action | Why it matters |
|---|---|---|
| Apply to cloth | Put small amount on microfibre cloth | Prevents over-wetting the surface |
| Circular motion | Work small panels evenly | Removes oils without stressing the finish |
| Wipe residue | Use a second clean cloth to remove residue | Stops tacky layer formation |
| Repeat pass | Only while cloth shows soil | Limits friction and potential damage |
“Multiple light passes protect the finish more than one hard scrub.”
How we spot-clean stains without harming leather
When a fresh mark appears, our priority is to act quickly and with controlled moves. Quick action limits spread and cuts the chance of a set-in stain.
Blot spills immediately
Blot — do not rub. We press a clean, soft cloth against the spill to lift liquid away. This step reduces discolouration and avoids pushing the mark deeper into the grain.
Mild soap solution versus a specialised product
We choose between a mild soap solution and a specialised product based on the finish and how long the stain has set. For most fresh, water-based marks we use a gentle soap on a damp cloth; for stubborn oily stains we opt for a formulation made for hide.
Handling ink and water-based stains
Ink is hard to remove once set and aggressive scrubbing makes things worse. For water-based spills (juice, coffee), we work in gentle circular motions from the outside edge towards the centre to avoid tide marks.
Dry the area fully
After removal, we blot the area dry and leave it to air completely. In humid Singapore conditions, we check seams and piping to ensure no trapped moisture causes later discolouration or damage.
“Multiple short, gentle passes are safer than one harsh attempt.”
| Stain type | Method | When to call a pro |
|---|---|---|
| Water-based (juice, coffee) | Blot, mild soap solution on damp cloth, circular motion | If rings remain after repeated gentle passes |
| Oily/grease | Specialised product applied sparingly; wipe residue with clean cloth | If finish dulls or tackiness appears |
| Ink | Minimal action; spot-treat with targeted solvent if safe for finish | When ink has set or surface colour lifts |
For more detailed guidance on how to remove common marks, see our recommended steps to remove stains from leather. We keep routines simple so you can maintain a clean leather sofa without risking harm.
How we remove mould safely in Singapore’s humid climate
Singapore’s humidity makes trapped damp a real risk for upholstered pieces. We begin by assessing the affected areas to judge whether the issue is surface-level or more extensive. Large coverage or deep penetration calls for professional help to avoid long-term damage.
Assessing severity and when to call a pro
We look for widespread spots, weakened stitching or odour. If the affected area is large or fibres feel soft, we advise a specialist assessment to reduce risk of permanent harm.
Protective gear and ventilation
We wear gloves, a mask and eye protection. Work in a well-ventilated room to lower exposure. Where possible, move the piece so air circulates all round the frame.
Cleaning method and drying
First we vacuum loose spores with a brush attachment to avoid grinding them into the surface. Then we wipe the area with mild soap and water on a damp cloth using light circular motions. We never scrub hard; that can remove finishes and cause damage.
After cleaning, we blot dry and leave the piece to air completely in a ventilated space. Remaining moisture encourages a return.
Preventing return
- Improve airflow and avoid pushing the item flush against walls.
- Keep indoor humidity around 40–60%.
- Use fans or dehumidifiers in persistently damp areas; avoid relying on direct sunlight alone.
| Step | Why it matters | Notes |
|---|---|---|
| Assess | Decide surface vs deep issue | Large coverage → call a pro |
| Protect | Reduce exposure | Gloves, mask, ventilation |
| Clean & dry | Remove spores safely | Mild soap, circular motion, full air dry |
How we condition and hydrate leather to maintain leather for years
To keep the hide supple and durable, we schedule conditioning as a deliberate follow-up to cleaning.
Why conditioning matters: conditioning replenishes lost oils and moisture that prevent drying and cracking. Regular treatment revitalises lustre and supports long-term performance in Singapore’s mixed humidity and air-conditioned environments.
How often and where we focus
For low to moderate use, we condition every 6–12 months. For heavy daily use, we shorten that to every 3–6 months. This schedule helps maintain leather for years without overdoing it.
We concentrate on high-contact areas: armrests, seat fronts and headrests. Any panel that feels dry or looks dull gets priority.
Application method and cautions
Use a small amount of product on a clean cloth, work in circular motions, allow absorption, then buff dry. Multiple light passes are safer than one heavy application.
- Avoid over-conditioning: too much product leaves a greasy feel and attracts dirt.
- Choose compatible products: test on a hidden area first to protect finishes.
“Consistent conditioning is the practical step that turns routine cleaning into genuine preservation.”
| Step | Why | Notes |
|---|---|---|
| Apply sparingly | Prevents build-up | Small amounts on a cloth |
| Focus areas | Protects wear zones | Arms, seat fronts, headrests |
| Buff after absorption | Restores sheen | Leave to absorb, then buff |
How we protect leather sofas day-to-day from sunlight, heat and dirt
Preventive care is the simplest way to stop fading and wear before it starts. We focus on placement, simple barriers and short weekly habits to keep furniture looking its best in Singapore’s climate.
Avoiding direct sunlight and UV exposure that fades finish
Minimise direct sunlight on seating by using curtains or blinds during peak hours. UV light fades colour and causes premature ageing.
Plan room layout so high-use areas are off the main sun line. This reduces uneven fading across panels.
Keeping pieces away from heating elements to prevent drying
Keep furniture clear of radiators, heaters and hot vents. Persistent heat dries oils and leads to cracking and discolouration.
Using throws and protective covers for pets, children and high-traffic spots
Use lightweight throws or slipcovers to catch dirt and oils. They are easy to wash and cut down on wet cleaning needs.
Simple habits that preserve appearance between cleans
- Dust weekly with a microfibre cloth and vacuum crevices monthly.
- Blot spills immediately and wipe up crumbs each day.
- Rotate cushions to balance wear and sun exposure.
- Maintain balanced humidity to slow drying and mildew.
“Short, frequent upkeep keeps surfaces consistent without heavy cleaning.”
| Action | Why | Frequency |
|---|---|---|
| Close blinds at noon | Reduce UV fade | Daily during bright months |
| Move at least 50cm from heat | Prevent drying and cracking | Permanent |
| Use throws | Protect from pets, kids and dirt | As needed |
| Dust & vacuum | Remove dust and crumbs | Weekly / monthly |
What we avoid and when we call in professional leather cleaning
We prioritise safety over speed. Some DIY moves seem helpful but cause long-term damage. Below we explain common mistakes, why following manufacturer guidance matters, and the clear signs that mean we should bring in a pro.
Common mistakes that cause damage
We never use harsh chemical cleaners such as bleach or ammonia. These strip protective layers and cause discolouration.
We avoid abrasive tools and vigorous scrubbing. Aggressive action can remove the finish and change texture.
We limit water. Excess moisture soaks seams, weakens glue and allows mould to form in humid Singapore conditions.
Why ignoring manufacturer guidance can make stains worse
Manufacturer labels matter: they tell us which products and methods are safe. Ignoring them risks voiding warranties and causing irreversible stains.
Using too much soap or product leaves a sticky layer that attracts dirt. More product is not better — it increases residue and shortens time between cleans.
Signs we call a professional
- Large or deep-set stains that do not improve after a couple of gentle passes.
- Widespread mould, strong odour or weakened stitching.
- Ink marks, heavy body-oil build-up, or colour transfer during a patch test.
Professional cleaning adds value: specialised tools and products extract grime more effectively, save time and extend furniture life. When in doubt, we stop and consult a pro to avoid further damage.
For step-by-step home care before calling experts, see our guide on how to easy clean your leather sofa in 7.
“If a stain resists two gentle attempts, we pause to avoid causing more harm.”
Conclusion
In closing, we offer a concise routine that prevents common marks and preserves quality.
We summarise our workflow: identify the hide type, remove dust and dirt safely, use products sparingly and dry each surface thoroughly. This approach keeps the leather sofa looking its best with minimal risk.
Treat spills immediately by blotting with a soft cloth, then spot-clean with a controlled solution only when needed. The right cloth choice matters—microfibre plus a final dry cloth pass reduces streaks and tacky residue.
Protect daily by managing humidity, maintaining airflow and reducing UV exposure in Singapore. Consistent care and occasional conditioning preserve appearance and long-term quality.
If stains persist, mould spreads or the finish looks compromised, we prioritise professional support to avoid irreversible damage.

